Diving into the art world can be awe-inspiring, particularly when you stumble upon a medium as versatile and captivating as Liquid Art Epoxy Resin. This high-quality, easy-to-use product opens up infinite possibilities for artistic expression, transforming regular artworks into extraordinary masterpieces.
Our comprehensive guide is set to unveil the secrets behind creating stunning resin artwork – from understanding epoxy resin types and their applications in the art to unlocking creative techniques for unique textures and effects.
Ready for an artistic adventure? Let’s get started!
Key Takeaways
- Liquid Art Epoxy Resin is a versatile medium that can enhance artistic projects, providing techniques for creating depth and dimension, unique textures and effects, and incorporating vibrant colors and pigments.
- Understanding different types of epoxy resin is crucial for selecting the right one for your project. Clear Casting Epoxy, Deep Pour Epoxy, UV Resistant Epoxy, Craft Epoxy, Tumbler Epoxy, and Floral Preservation Epoxy each have specific uses and properties.
- Techniques such as layering, embedding objects, tinting resin, creating drips or waves, and using additives like glitter or crushed glass can help create depth and visual interest in resin artwork.
- Incorporating color through resin dyes, acrylic paints, alcohol inks, or mica powders can bring vibrancy to epoxy art projects. Layering pigments allow for stunning depth while experimenting with glitter or flakes adds sparkle to finished pieces.
Understanding Liquid Art Epoxy Resin
Epoxy resin is a versatile material used in art to create unique and stunning effects, with different epoxy resin offering various properties and applications.
What is epoxy resin?
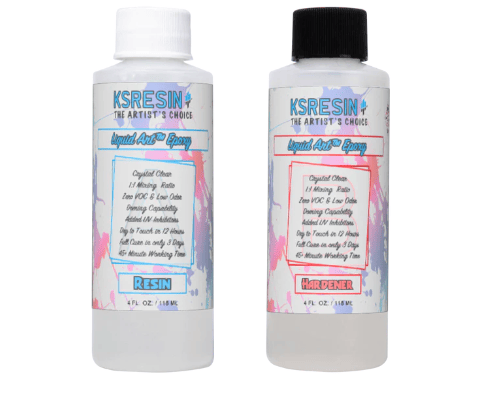
Epoxy resin is a high-quality compound largely utilized in various forms of artistry due to its versatile nature. Often preferred for its long working time and easy-to-use formula, epoxy resin comprises the resin itself and the hardener.
When mixed, these components undergo a chemical reaction resulting in a stable and durable product ideal for creating unique patterns or designs. The versatility of this medium extends to multiple art forms such as casting, jewelry making, and, notably, the growing trend of resin art.
Epoxy’s outstanding characteristics, like UV and scratch resistance and Crystal Rock’s Super Clear Epoxy Resin, open limitless potential for artistic innovation.
How is epoxy resin used in art?
Epoxy resin is a versatile medium that has gained popularity in art for its ability to enhance artistic projects. Artists use epoxy resin in various art forms, such as resin art, resin casting, and resin jewelry making.
Resin art combines epoxy resin with color pigments and additives to create unique patterns and designs. This allows artists to add depth, dimension, and vibrant colors.
With its long working time and easy-to-use formula, epoxy resin gives artists flexibility and control over their creative process. Whether you’re a beginner or an experienced artist, exploring the possibilities of epoxy resin can greatly enhance your artistic vision and take your creations to new levels of beauty.
Different types of epoxy resin
Several types of epoxy resin are available today, each with unique properties and use. Here are some of the most common types:
- Clear Casting Epoxy: This type of epoxy resin is specifically designed for casting projects, such as creating jewelry or small decorative items. Its low viscosity allows it to flow easily into molds and capture fine details.
- Deep Pour Epoxy: Deep pour epoxy resin is formulated to allow for thicker pours without generating excessive heat or bubbles. It is ideal for creating river tables, countertops, and other large-scale projects requiring thick resin layers.
- UV Resistant Epoxy: UV-resistant epoxy resin contains additives that protect against yellowing and damage caused by exposure to sunlight. This makes it ideal for outdoor applications or artwork displayed in bright environments.
- Craft Epoxy: Craft epoxy resin is a versatile option that can be used for various art and craft projects. It has a medium viscosity makes it easy to work with, and it can be used for coating surfaces, encapsulating objects, or creating unique art pieces.
- Tumbler Epoxy: Tumbler epoxy is specially formulated to provide a high-gloss finish on tumblers or drinkware items. It is resistant to scratches and provides a durable protective coating.
- Floral Preservation epoxy: This type of epoxy resin is designed specifically for preserving flowers and other organic materials in clear resin blocks or paperweights. It has a low exotherm, which generates less heat during the curing process to avoid damaging delicate materials.
Enhancing Your Artistic Vision with Liquid Art Epoxy Resin
Liquid Art Epoxy Resin enhances your artistic vision by providing techniques to create depth and dimension, unique textures and effects, and incorporating color and pigments in your art projects.
Techniques for creating depth and dimension
To create depth and dimension in your resin art, you can utilize various techniques that enhance the visual appeal of your artwork. Here are some effective methods to consider:
- Layering: Build up layers of epoxy resin to add depth to your artwork. Begin with a base layer and gradually add subsequent layers with different colors, textures, or effects. This technique creates a sense of depth as viewers can visually explore the different layers within the artwork.
- Embedding: Incorporate various materials within the resin to add dimension. You can embed objects like dried flowers, gemstones, shells, or photographs into your artwork. This technique creates a three-dimensional effect and makes your piece more visually intriguing.
- Tinting: Experiment with tinting your epoxy resin using color pigments or dyes. By adding transparent or translucent colors to the resin, you can create multi-tonal or gradient effects that give depth to your artwork.
- Drips and drippings: Use controlled drips and drippings along the edges or in specific areas of your piece to add movement and create an illusion of cascading fluidity. This technique adds visual interest and enhances the dynamic nature of your resin art.
- Resin waves or ripples: Create waves or ripples within the epoxy resin by manipulating it while it is still fluid. You can achieve this by gently blowing on the surface or using tools like heat guns or blowtorches to create patterns and textures that simulate movement.
- Resin geodes: Create stunning geode-inspired designs by incorporating crushed crystals, glass beads, metallic powders, or glitter into your resin art. This technique adds depth and sparkle while mimicking the natural formations found in geodes.
Creating unique textures and effects
Liquid Art Epoxy Resin allows artists to create stunning and unique textures and effects in their artwork. Here are some techniques to help enhance your artistic vision:
- Incorporating additives: By adding different materials to the resin, such as glitter, mica powder, or crushed glass, you can create interesting textures and visual effects. Experiment with different combinations to achieve the desired look.
- Swirls and marbling: Use a stirring tool or a skewer to swirl different resin colors gently. This technique creates mesmerizing patterns and depth in your artwork.
- Layering: Apply multiple layers of resin with varying levels of transparency or opacity to create depth and dimension. This technique works especially well for creating realistic water or sky effects.
- Textured surfaces: Explore using unconventional tools like sponges, brushes, or even plastic wrap to add texture to your resin. These textured surfaces will add a tactile element to your artwork.
- Heat manipulation: Applying heat using a heat gun or blowtorch can create interesting effects within the resin, such as cells or bubbles. Be cautious when using heat and ensure proper ventilation.
- Embedding objects: Liquid Art Epoxy Resin allows you to embed various objects into your artwork, such as dried flowers, shells, or beads. This adds a unique dimension and personal touch to your creations.
- Smoothing out rough edges: If you want a sleek and polished finish for your artwork, use sandpaper or a rotary tool to smooth out any rough edges or imperfections once the resin has cured.
Incorporating color and pigments
Incorporating color and pigments can take your artistic vision to new heights when working with Liquid Art Epoxy Resin. Here are some techniques to enhance your resin art projects:
- Use resin dyes: Add a few drops of resin dye to the epoxy mixture to create vibrant, translucent colors. Experiment with different color combinations for unique effects.
- Mix in acrylic paints: Add small amounts to the epoxy resin to achieve opaque colors and interesting textures. Swirl or blend the colors for a marbled or abstract look.
- Explore alcohol inks: Alcohol inks create stunning, vibrant colors when mixed with epoxy resin. Drop them directly onto the resin surface, or use a brush or sponge to blend and create beautiful patterns.
- Try mica powders: Add shimmer and metallic finishes to your resin art. Mix them with the epoxy resin before pouring them, or dust them onto wet resin for a subtle sparkle effect.
- Experiment with glitter and flakes: Sprinkle glitter, sequins, or metallic flakes onto the wet resin to add depth and visual interest. Play around with different sizes and shapes for varying effects.
- Layer pigments: Pour multiple layers of colored epoxy resin to create stunning depth and dimension in your artwork. Let each layer cure partially before adding the next one for clean lines and distinct color separation.
Tips and Tricks for Working with Liquid Art Epoxy Resin
Discover expert tips and tricks for working with Liquid Art Epoxy Resin to elevate your artistic creations. From preparation and mixing to application and curing, this section will equip you with the knowledge you need to navigate common challenges and achieve stunning results.
Keep reading to unlock the secrets of mastering this versatile medium!
Preparation and mixing
Proper preparation and mixing are essential to ensure successful results when working with Liquid Art Epoxy Resin. Here are the key steps to follow:
- Gather all necessary supplies and materials, including epoxy resin, hardener, measuring cups, mixing containers, stirring sticks, gloves, and a well-ventilated workspace.
- Read the manufacturer’s instructions carefully before starting. Different epoxy resins may have specific mixing ratios and curing times.
- Measure the required amount of epoxy resin and hardener using separate measuring cups. Be precise in your measurements to ensure the desired consistency and curing properties.
- Pour the measured resin into a clean mixing container. Avoid contaminants such as dust or debris that can affect the clarity of the final result.
- Add the hardener to the resin according to the manufacturer’s instructions. Use a ratio recommended for your specific project or desired effect.
- Mix thoroughly using a stirring stick or paddle mixer until both components are fully combined. Scrape the sides and bottom of the container to incorporate any unmixed resin or hardener.
- Stir slowly and avoid introducing air bubbles during mixing. If air bubbles appear during stirring, let them rise to the surface before pouring, or use a heat gun or torch to remove them gently.
- Follow any additional instructions from the manufacturer regarding degassing or vacuuming if necessary.
- Allow the mixed resin to sit for a few minutes before applying it to your artwork or desired surface.
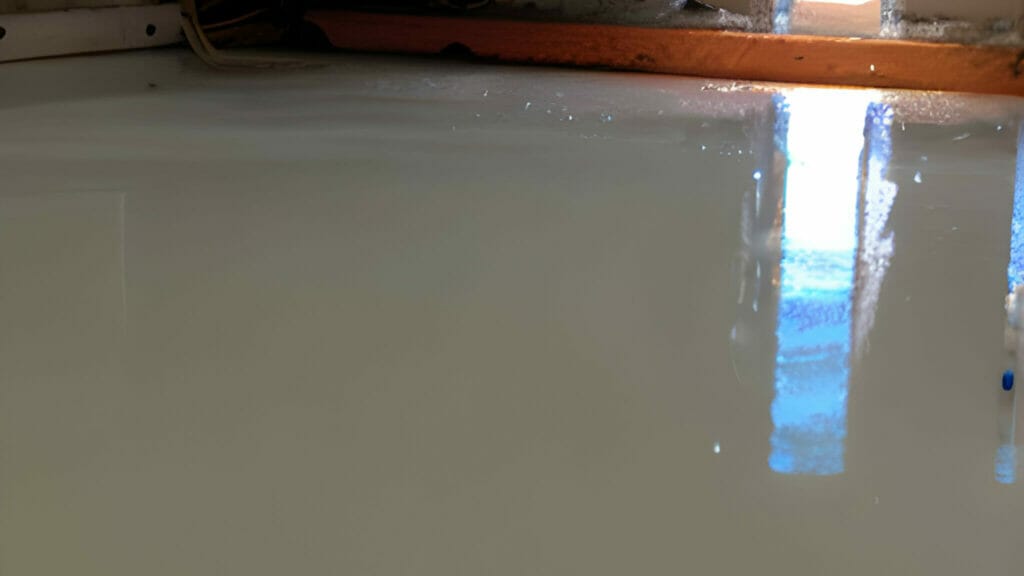
Application and curing process
Liquid Art Epoxy Resin offers an easy-to-use application and curing process, allowing artists to bring their artistic vision to life. Here’s a step-by-step guide to applying and curing this versatile epoxy resin:
- Prepare the surface: Make sure your artwork surface is clean, dry, and free from dust or debris. You can use sandpaper to smooth out any imperfections if needed.
- Measure and mix: Follow the instructions provided by the manufacturer to measure the correct ratio of epoxy resin and hardener. Use a disposable mixing container and stir thoroughly for at least two minutes, ensuring the components are fully combined.
- Add color and pigments (optional): If you want to incorporate color into your artwork, now is the time to add it. Mix in small amounts of liquid or powder pigments until you achieve your desired hue.
- Apply the resin: Pour the mixed epoxy resin onto your prepared surface. Use a spreader or brush to evenly distribute the resin across your artwork, ensuring full coverage.
- Create effects: This is where your artistic vision comes into play! Experiment with different techniques such as pouring, swirling, or using tools like heat guns or blowtorches to create unique textures and patterns in the resin.
- Remove air bubbles: After pouring, gently blow on the surface with a straw or use a heat gun on a low setting to remove any trapped air bubbles that may have formed during application.
- Let it cure: Allow your artwork to cure undisturbed in a clean, dust-free environment for the recommended curing time specified by the manufacturer. The curing time will vary depending on factors such as temperature and thickness of the resin layer.
- Finishing touches: Once cured, check for imperfections or uneven areas on your artwork’s surface. If necessary, you can sand down any rough spots with fine-grit sandpaper before applying another layer of epoxy resin for a smooth, glossy finish.
Dealing with common challenges
Liquid Art Epoxy Resin can offer stunning results to enhance your artistic vision, but it’s important to be prepared for common challenges that may arise during the process. Here are some tips for addressing these challenges:
- Avoiding air bubbles: Air bubbles can detract from the smooth finish of your resin art. Mix the epoxy resin slowly and thoroughly to minimize them, ensuring no additional air is introduced while stirring. Additionally, use a heat gun or blowtorch to gently pass over the surface of the resin to help release any trapped bubbles.
- Dealing with uneven curing: Uneven curing can occur when the resin sets at different rates in different areas of your artwork. To prevent this, mix the resin according to the manufacturer’s instructions and apply it evenly across your piece. If you notice areas not fully cured after the recommended curing time, you can carefully apply a thin layer of fresh resin to those spots and allow it to cure again.
- Preventing dust and debris: Dust particles or debris can easily become trapped in your resin artwork, resulting in an imperfect finish. To avoid this, work in a clean and dust-free environment. Cover your piece with a dust-resistant cover while it cures; consider using a dust removal spray or torching technique to eliminate any visible particles before applying the resin.
- Managing excessive heat buildup: Excessive heat can cause problems such as accelerated curing or bubbling when working with epoxy resin. Avoid placing your resin art in direct sunlight or near other intense heat sources during curing to prevent this. Use ambient temperature conditions for optimal results.
- Preventing yellowing over time: Epoxy resins can develop a yellowish tint due to exposure to UV light or certain environmental factors. To combat yellowing, choose an epoxy resin product specifically formulated for UV resistance and opt for UV protective finishes or varnishes for long-lasting clarity.
Inspiration and Next Steps
Explore the gallery of stunning resin art projects, discover additional resources for learning and experimenting with liquid art epoxy resin, and be inspired to push your creative boundaries.
Examples of resin art projects
Resin art projects offer endless possibilities for creativity and expression. Here are some inspiring examples to spark your artistic vision:
- Ocean-inspired Resin Painting: Create stunning abstract artwork with layers of blues and greens resembling the mesmerizing depths of the ocean.
- Geode-inspired Resin Coasters: Use epoxy resin to mimic the beauty of natural geodes by combining different pigments and glitter for a sparkling effect.
- Resin Jewelry: Craft unique jewelry pieces like pendants or earrings by embedding small objects like dried flowers or metallic flakes in clear resin.
- Alcohol Ink Art with Resin: Experiment with alcohol ink on a surface and seal it with resin to preserve vibrant colors and create an eye-catching glossy finish.
- Wood and Resin Wall Art: Combine wood slices or panels with epoxy resin to create striking wall art pieces that showcase the natural beauty of wood enhanced by glossy resin accents.
- Dried Flower Encased in Resin: Preserve delicate blooms by embedding them in clear resin, creating elegant paperweights or decorative elements for your home.
- River Table with Resin Inlays: Design a unique river table by pouring epoxy resin between two slabs of wood, creating beautiful rivers or lakes that add depth and dimension to your furniture.
- Fluid Acrylic Pouring on Canvas: Explore the mesmerizing technique of acrylic pouring using epoxy resin as a topcoat to protect the vibrant colors and provide a glossy finish.
- Epoxy-Coated Tumblers: Give your everyday drinkware a touch of luxury by coating tumblers with epoxy resin, creating personalized designs that are durable and long-lasting.
- Petri Dish Art: Experiment with different colors of liquid resin poured into Petri dishes to create mesmerizing abstract patterns that resemble microscopic biological structures.
Resources for further learning and exploration
To further enhance your artistic vision and explore the endless possibilities of liquid art epoxy resin, here are some valuable resources for learning and expanding your knowledge:
- Online tutorials and video courses: Platforms like YouTube, Skillshare, and Udemy offer step-by-step tutorials and comprehensive online courses on resin art techniques, tips, and tricks.
- Art communities and forums: Joining online communities like resin art Facebook groups or Reddit threads can provide a supportive network of fellow artists who can share their experiences, offer advice, and inspire.
- Books and publications: Several books dedicated to epoxy resin art delve into advanced techniques, design ideas, and project inspiration. Some popular titles include “Resin Art: A Comprehensive Guide for Beginners” by Emma Walker and “The Art of Resin Jewelry” by Sherri Haab.
- Workshops and classes: Check local art schools, community centers, or galleries in your area for hands-on workshops or classes conducted by experienced resin artists. These immersive learning experiences can help you refine your skills while connecting with other artists in person.
- Resin suppliers’ websites: Many companies that manufacture epoxy resin products also provide educational content. Look for sections like blogs or resources where you can find valuable information on using specific epoxy resins, troubleshooting common issues, and exploring new techniques.
- Social media platforms: Instagram is a great platform to discover talented resin artists who share their work process, techniques, and inspiration through images and videos. Follow hashtags like #resinart or #epoxyart to discover new trends and ideas.
Encouragement to experiment and push creative boundaries.
Embrace the limitless possibilities of liquid art epoxy resin and let your imagination soar! As an artist, pushing your creative boundaries and constantly exploring new techniques is essential.
With its versatility and easy-to-use nature, liquid art epoxy resin offers the perfect medium for experimentation. Don’t be afraid to mix colors, experiment with different textures, or combine resin with other materials to create truly unique pieces.
Let your artistic vision guide you as you discover exciting ways to enhance your art using liquid art epoxy resin.
Conclusion
In conclusion, liquid art epoxy resin is a game-changer for artists seeking to enhance their artistic vision. With its versatility and easy-to-use formula, this premium-quality resin offers endless possibilities for creating depth, dimension, and unique textures in your artwork.
Whether you’re a beginner or an experienced artist, exploring the world of liquid art epoxy resin will surely take your creativity to new heights. So grab some resin, mix it up, and let your imagination soar!
FAQs
1. What is liquid art epoxy resin, and how can it enhance my artistic vision?
Liquid art epoxy resin is a clear, high-gloss coating that can be applied to artwork to create a glossy, glass-like finish. It enhances the vibrancy of colors and adds depth and dimension to your artwork, making it appear more professional and visually striking.
2. Can I use liquid art epoxy resin on any artwork?
Yes, liquid art epoxy resin can be used on various artworks such as paintings, sculptures, woodwork, jewelry, and more. It provides a versatile medium for artists to experiment with different techniques and create unique effects.
3. How do I apply liquid art epoxy resin to my artwork?
Applying liquid art epoxy resin requires careful preparation and following specific instructions. Generally, you’ll need to thoroughly mix the two components (resin and hardener) according to the manufacturer’s guidelines. Then you pour the mixture onto your artwork and spread it evenly using a brush or other applicator. Remove any air bubbles and let them cure for the recommended time.
4. Should I take any safety precautions when working with liquid art epoxy resin?
Yes, working with liquid art epoxy resin involves certain safety precautions. It’s important to wear protective gloves and clothing when handling the substance as it can cause skin irritation or allergic reactions in some individuals. Adequate ventilation is also necessary as the fumes emitted during application may be harmful if inhaled excessively. Additionally, carefully read all product labels for manufacturers’ specific safety instructions before starting your project.