Glitter tumblers are a trendy DIY project that involves adding glitter to a tumbler and sealing it with epoxy resin. These glittery and sparkly tumblers make great gifts or custom pieces for personal use. In this article, we will go over the materials needed, step-by-step instructions, and tips and tricks for making your glitter tumblers with epoxy.
To make glitter tumblers with epoxy, you will need:
- A tumbler
- Glitter
- Epoxy resin
- Mixing cups and stir sticks
- Disposable gloves
- Painter’s tape
- A glitter tumbler turner
- A heat gun or torch
These materials can be found at most craft stores or online.
The process of making glitter tumblers with epoxy involves:
- Preparing the tumbler
- Mixing the epoxy resin and glitter
- Applying the resin to the tumbler
- Removing air bubbles
- Allowing the tumbler to dry and cure
It is important to follow the instructions on the epoxy resin carefully to ensure proper ratios and drying times.
After the tumbler is dry and cured, you can remove the painter’s tape and clean up any rough edges. If desired, you can add additional coats of epoxy resin for a smoother and more durable finish.
To care for your glitter tumbler, it is important to:
- Hand wash only
- Avoid extreme temperatures
- Not soak or scrub the tumbler
This will help maintain the integrity of the glitter and ensure a long-lasting tumbler.
Some tips and tricks for making glitter tumblers include:
- Using fine glitter for a smooth finish
- Using a tumbler turner for even coating
- Experimenting with different glitter colors and techniques for unique designs
With these tips and careful execution, you can create beautiful and unique glitter tumblers with epoxy.
Key Takeaways:
- Making glitter tumblers with epoxy requires specific materials, such as a tumbler, glitter, and epoxy resin, as well as tools like a heat gun and painter’s tape.
- The process involves preparing the tumbler, mixing the epoxy resin and adding glitter, applying the resin, using a heat gun to remove air bubbles, and allowing the tumbler to dry and cure.
- To care for glitter tumblers, avoid extreme temperatures, do not soak or put them in the dishwasher, and wash your hands only with mild soap and water.
What Are Glitter Tumblers?
Glitter tumblers are drinkware that is typically made from stainless steel or plastic and are insulated to keep drinks at the desired temperature. These tumblers are adorned with glitter, creating a sparkly and decorative appearance. They are often handcrafted, with epoxy resin used to secure the glitter in place.
It is a fact that glitter tumblers have become increasingly popular among crafters and DIY enthusiasts due to their customizable and eye-catching designs.
What Materials Do You Need To Make Glitter Tumblers With Epoxy?
Before diving into the fun and creative process of making glitter tumblers with epoxy, it’s important to gather all the necessary materials. In this section, we will discuss the essential items needed for this project, including the tumbler itself, glitter, and epoxy resin. We’ll also cover additional tools and supplies such as mixing cups, disposable gloves, painter’s tape, a glitter tumbler turner, and a heat gun or torch. With these materials in hand, you’ll be ready to create your own sparkling and unique tumbler designs.
1. Tumbler
- Opt for a stainless steel or insulated tumbler for improved temperature retention.
- Examine the tumbler for any dents, scratches, or imperfections before using it.
- Make sure the tumbler is clean and dry before beginning the glitter application process.
2. Glitter
- Select your desired glitter color that will complement the base color of your tumbler.
- Prepare the tumbler surface by thoroughly cleaning and degreasing it to ensure better adhesion.
- Sprinkle the glitter evenly onto the epoxy resin, making sure to achieve full coverage.
- Carefully mix the glitter and epoxy to prevent air bubbles and achieve a consistent sparkle.
When choosing glitter for your tumbler, consider using fine or chunky glitter to create different effects, and always seal the glitter with multiple layers of epoxy for a long-lasting finish.
3. Epoxy Resin
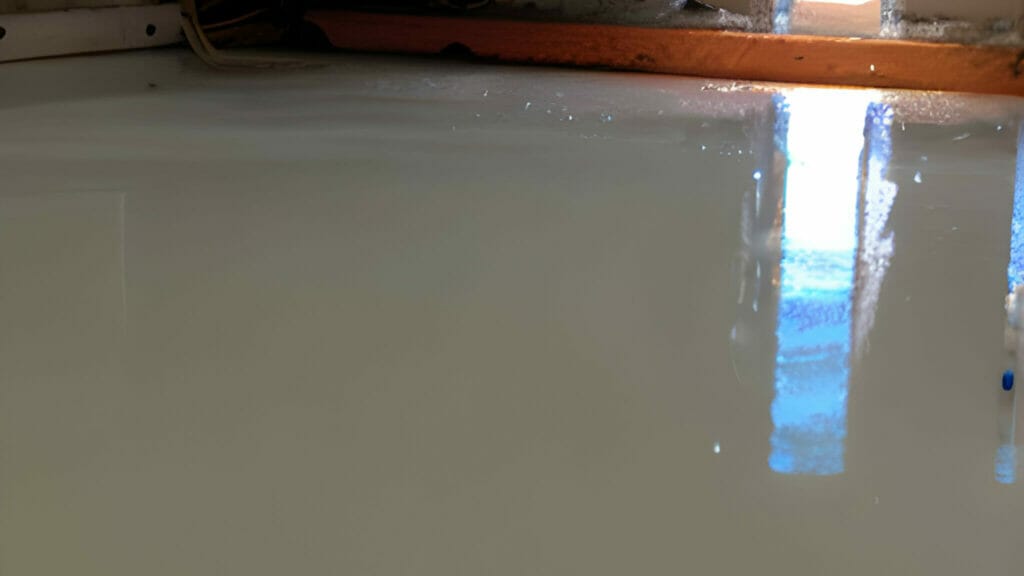
Epoxy resin is an essential ingredient in creating glitter tumblers. It serves as the bonding agent, producing a sleek and shiny surface. When working with epoxy resin, make sure to have adequate ventilation and wear protective gear as it may emit fumes. Also, be sure to carefully follow the manufacturer’s instructions for the proper mixing ratio and curing time.
After application, the epoxy resin must be given enough time to cure completely in order to achieve a strong and enduring glitter tumbler.
4. Mixing Cups and Stir Sticks
- Utilize disposable mixing cups and stir sticks to measure and mix the epoxy resin and glitter accurately accurately.
- Ensure that the ratio of epoxy resin to glitter is precise for a thoroughly blended mixture.
- Properly dispose of the used cups and sticks to prevent cross-contamination and maintain a clean crafting environment.
5. Disposable Gloves
- Before beginning work on the tumbler, make sure to put on a pair of disposable gloves to protect your hands from the epoxy resin and glitter.
6. Painter’s Tape
- Cover the top and bottom edges of the tumbler with Painter’s Tape to create clean lines and prevent epoxy resin from dripping onto unwanted areas.
- Press the edges of the tape firmly to ensure a tight seal and avoid seepage of epoxy resin under the tape during application.
- Remove the Painter’s Tape carefully after the final epoxy resin coat has been applied and is partially cured, ensuring a smooth and clean edge.
7. Glitter Tumbler Turner
Attach the tumbler securely to the glitter tumbler turner using the adjustable grip to maintain stability while crafting.
Start the turner at a slow to medium speed to spread the mixture of epoxy resin and glitter evenly, preventing drips or uneven coatings.
Leave the glitter tumbler turner rotating for the entire curing process of the epoxy resin to ensure a flawless finish.
8. Heat Gun or Torch
- Use a heat gun or torch to eliminate any air bubbles from the epoxy resin on the tumbler’s surface.
How To Make Glitter Tumblers With Epoxy?
Have you ever wanted to add a touch of sparkle to your drinkware collection? Look no further! In this section, we will guide you through the step-by-step process of making glitter tumblers with epoxy resin. From preparing the tumbler to adding the final coats of resin, we’ll cover all the necessary techniques and tips to create a beautiful and durable glitter tumbler. So, let’s get started on this fun and creative project!
1. Prepare the Tumbler
- Begin by thoroughly cleaning the tumbler with soap and water.
- Once clean, dry the tumbler using a clean, lint-free cloth.
- Make sure the surface of the tumbler is free from any dust or debris.
- If necessary, use rubbing alcohol to wipe the tumbler for optimal adhesion.
2. Mix the Epoxy Resin
- Prepare the tumbler by ensuring it is clean and dust-free.
- Measure the epoxy resin and hardener in the correct ratio as per the product instructions.
- Pour the resin and hardener into a mixing cup.
- Mix the Epoxy Resin: Stir the mixture thoroughly for at least 3-5 minutes.
- Scrape the sides and bottom of the mixing cup to ensure the resin and hardener are fully combined.
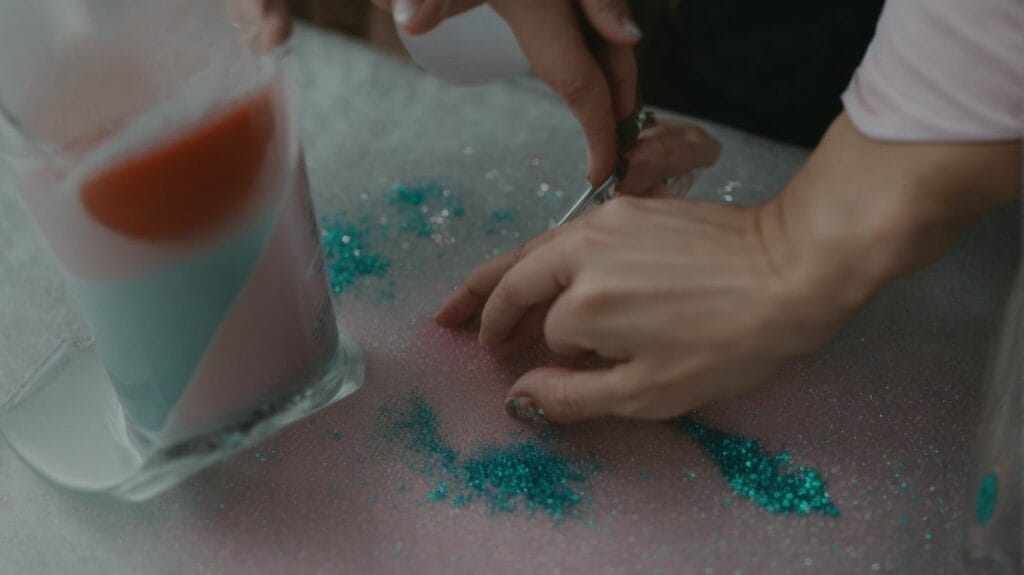
3. Add Glitter to the Epoxy Resin
- Prepare the glitter: Choose fine or chunky glitter in your desired colors.
- Measure epoxy resin: Follow the manufacturer’s instructions to measure the epoxy resin accurately accurately.
- Add the glitter to the resin: Sprinkle the measured glitter into the mixed epoxy resin, making sure to distribute it evenly.
- Thoroughly stir: Gently stir the mixture of glitter and resin to prevent the formation of air bubbles.
- Apply the mixture: Carefully apply the resin infused with glitter onto the tumbler, ensuring an even coat.
4. Apply the Epoxy Resin to the Tumbler
- Cover your work area with a plastic drop cloth to protect it from any spills of epoxy resin.
- Elevate the tumbler on a tumbler turner to ensure the even application of the epoxy resin.
- In a well-ventilated area, use a disposable brush or foam brush to apply the epoxy resin to the tumbler.
- Slowly rotate the tumbler to spread the resin evenly and achieve full coverage.
- Check for any drips or pooling of resin and immediately eliminate them.
5. Use a Heat Gun or Torch to Remove Air Bubbles
- Prepare the tumbler by placing it on a tumbler turner for consistent rotation.
- Mix the epoxy resin thoroughly to ensure a smooth and consistent mixture.
- Add the glitter while continuously stirring the epoxy resin mixture.
- Apply the epoxy resin to the tumbler in an even and smooth manner.
- To remove any air bubbles, use a heat gun or torch and carefully move it over the surface.
- Allow the tumbler to fully dry and cure before handling.
- Carefully remove the painter’s tape and clean up any rough edges.
- For a strong and durable finish, apply additional coats of epoxy resin.
6. Let the Tumbler Dry and Cure
- Place the tumbler on the tumbler turner for even drying.
- Allow the epoxy to cure for the recommended duration, typically 24-72 hours.
- Keep the tumbler in a dust-free, warm, and dry area to ensure proper curing.
After the tumbler has dried and cured, inspect it for any imperfections and make necessary touch-ups. Enjoy your sparkling new tumbler!
7. Remove Painter’s Tape and Clean Up Edges
- Carefully peel off the painter’s tape to reveal clean edges of the paint.
- In case of any seepage of epoxy resin, gently sand the edges to smooth them.
- Wipe off any remaining glitter or epoxy residue from the tumbler using a damp cloth.
8. Apply Additional Coats of Epoxy Resin
- Sand the tumbler lightly with fine-grit sandpaper to create a surface for the additional epoxy to adhere to.
- Clean the tumbler to remove any dust or debris from sanding.
- Mix a new batch of epoxy resin according to the manufacturer’s instructions.
- Apply additional coats of epoxy resin to the tumbler, covering the entire surface evenly.
- Use a heat gun or torch to remove any air bubbles that may have formed during the application.
- Allow the tumbler to dry and cure completely before using or handling it.
- Inspect the tumbler for any imperfections and sand lightly, if necessary, before applying further coats.
- Repeat the process of applying additional coats until the desired finish and smoothness are achieved.
How To Care For Glitter Tumblers?
After creating your beautiful glitter tumblers using epoxy resin, it’s important to know how to care for them to ensure their longevity properly. In this section, we will discuss the key steps to caring for your glitter tumblers. First, we will cover the importance of hand washing and avoiding extreme temperatures. Then, we will touch on the potential risks of soaking your glitter tumblers in water for extended periods. By following these tips, you can keep your glitter tumblers looking sparkly and vibrant for years to come.
1. Hand Wash Only
- To properly clean your glitter tumbler, use mild dish soap and a soft cloth for hand washing.
- After washing, make sure to rinse thoroughly with water and allow the tumbler to air dry completely before using it again.
- Avoid using abrasive sponges or harsh cleaning agents, as they can cause damage to the glitter and epoxy coating.
One time, a friend made the mistake of putting her glitter tumbler in the dishwasher despite the clear “hand wash only” instructions. Unfortunately, the high heat of the dishwasher caused the epoxy to warp and the glitter to lose its shine. She learned the hard way that “hand wash only” truly means hand wash only!
2. Avoid Extreme Temperatures
- It is important to avoid leaving glitter tumblers in places exposed to extreme heat or cold.
- Extreme temperatures can cause the epoxy resin to soften or become brittle, which can negatively impact the tumbler’s durability.
- To maintain the quality and appearance of glitter tumblers, it is best to store them at room temperature.
3. Do Not So
- Please do not soak the glitter tumbler in water for extended periods, as it may damage the epoxy finish.