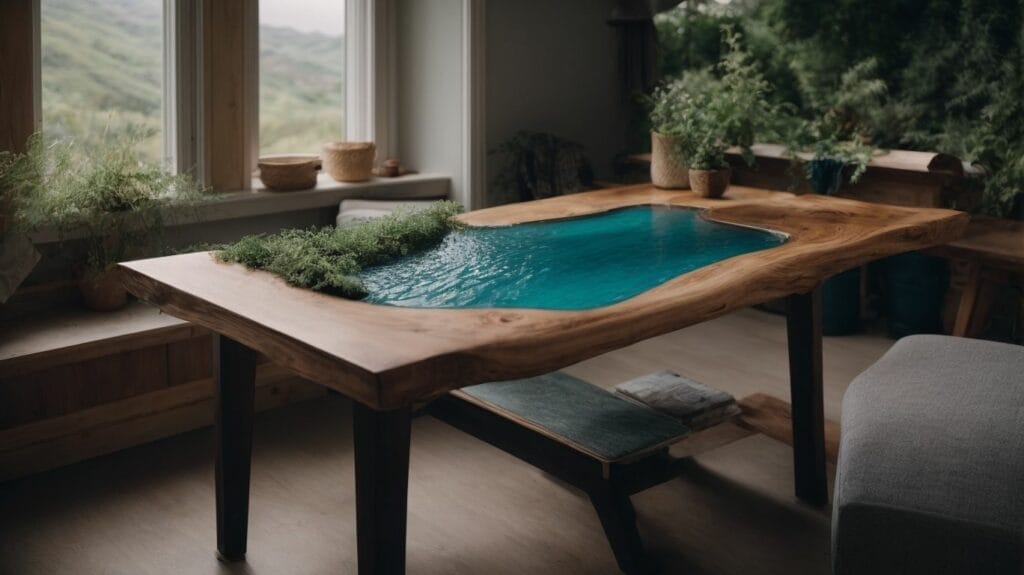
A river table is a unique piece of furniture that features a “river” of epoxy resin running through the center, creating a stunning and one-of-a-kind design. It is a popular trend in the world of woodworking and has gained popularity for its modern and artistic appeal.
Making a river table requires some basic materials and tools, and with a step-by-step guide, it can be a fun and rewarding DIY project.
To make a river table, you will need:
- Wood slabs
- Epoxy resin
- Tools such as a sander saw and measuring tools
The type of wood and Epoxy resin used will depend on your personal preference and budget. It is essential to choose a wood slab with a natural edge, as this will give the table a more organic and rustic look.
Here is a step-by-step guide on how to make a river table:
- Preparing the wood slabs:
- Start by sanding and smoothing the wood slabs.
- Remove any bark or jagged edges, and fill any cracks or holes with epoxy resin.
- Creating the mold:
- Build a mold around the wood slabs using plywood and seal it with silicone caulk.
- This will prevent the epoxy resin from leaking.
- Mixing and pouring the epoxy resin:
- Follow the instructions on the epoxy resin packaging to mix it properly.
- Then, pour the resin into the mold, making sure to cover the wood slabs evenly.
- Removing air bubbles:
- Use a heat gun or a blowtorch to remove air bubbles that may have formed in the resin.
- Adding pigments or dyes (optional):
- If you want to add color to your river table, you can mix in pigments or dyes before pouring the resin.
- Sanding and finishing the table:
- Once the resin has cured, remove the table from the mold and sand it to smooth out any imperfections.
- Then, apply a finishing coat to protect the wood and give it a glossy finish.
The time it takes to make a river table will depend on the size and complexity of the project. It can take anywhere from a few days to a few weeks to complete, as the resin needs time to cure properly.
Some tips for making a river table include choosing the right wood and epoxy resin, following the manufacturer’s instructions carefully, and using safety equipment, such as gloves and a respirator, when working with epoxy resin. It is also essential to work in a well-ventilated area to avoid inhaling fumes.
The benefits of making a river table are that it is a fulfilling and creative project. The result is a unique and visually appealing piece of furniture that can be customized to fit your style and taste.
To care for a river table, avoid placing hot or sharp objects directly on the surface, and regularly clean it with a damp cloth. It is also recommended to reapply a finishing coat every few years to maintain the table’s shine.
Key Takeaways:
- A river table is a unique and modern piece of furniture that incorporates a “river” of epoxy resin between two wood slabs.
- To make a river table, you will need wood slabs, epoxy resin, and various tools and equipment for preparation and finishing.
- To create a river table, prepare the wood slabs, create a mold, mix and pour the resin, remove air bubbles, add pigments, and finish the table.
What Is a River Table?
A river table is a distinctive furniture piece created by connecting two wood slabs, leaving a gap in the middle, and filling it with epoxy resin to achieve a river-like appearance. This method enhances the inherent beauty of the wood while incorporating a contemporary design element. River tables are commonly used as coffee tables or decorative pieces, adding a touch of sophistication to any room.
What Materials Do You Need to Make a River Table?
If you’re looking to create a stunning piece of furniture that incorporates the beauty of nature, a river table may be just the project for you. The key to making a successful river table is having the right materials. In this section, we will discuss the essential components needed for creating a river table, including wood slabs, epoxy resin, and specific tools and equipment. By the end of this section, you’ll have a better understanding of what is required to bring your river table vision to life.
1. Wood Slabs
- Choose high-quality wood slabs with desirable grain patterns and dimensions suitable for the table size.
- Ensure the slabs are properly dried and free from any defects like cracks or warping.
- Select wood species that complement the design and aesthetic appeal of the table.
2. Epoxy Resin
Epoxy resin is an essential component in creating a river table. When choosing 2. epoxy resin, it is important to consider its quality, UV resistance, and self-leveling abilities. Popular brands such as Pro Marine Supplies and MAS Epoxies are known for their high-gloss finish and minimal bubbling.
3. Tools and Equipment
- Protective Gear: Wear safety goggles, gloves, and a respirator to safeguard against epoxy fumes and dust.
- Measuring Tools: Use precise measuring cups and mixing containers for accurate epoxy resin ratios.
- Mixing Tools: Prepare with stirring sticks, a heat gun, or a propane torch to remove air bubbles.
- Sanding Equipment: Invest in sanders and high-grit sandpaper for a smooth finish.
Pro-tip: Prioritize quality tools and equipment for a seamless crafting experience when making a river table.
Step-by-Step Guide to Making a River Table
Making a river table is a popular woodworking project that combines the natural beauty of wood with the striking effects of epoxy resin. In this section, we will provide a detailed step-by-step guide on how to make your river table. From preparing the wood slabs to adding color and finishing touches, we will cover each stage of the process to help you create a stunning and unique piece of furniture. So, let’s dive in and learn how to make a river table from start to finish.
1. Preparing the Wood Slabs
When preparing the wood slabs for a river table, follow these steps:
- Inspect the slabs for cracks, knots, or other imperfections.
- Trim the edges and flatten the surfaces using a joiner and planer.
- Arrange the slabs in the desired layout, ensuring a perfect fit.
- Secure the slabs together using dowels or biscuits for stability.
A skilled woodworker once meticulously prepared wood slabs for a river table, only to discover a beautiful hidden grain pattern, making the final piece truly remarkable.
2. Creating the Mold
- Prepare the workspace and gather the necessary tools and materials.
- Measure and cut the mold material according to the table dimensions.
- Creating the Mold: Assemble the mold, ensuring it is watertight and level.
- Seal the edges and corners of the mold to prevent any resin leakage.
3. Mixing and Pouring the Epoxy Resin
- Prepare the work area by covering it with a plastic sheet or tarp to protect it from spills and mess.
- Measure the epoxy resin and hardener in the correct ratio as per the product instructions and mix thoroughly.
- Pour the mixed epoxy resin into the river table mold, ensuring even coverage.
- Use a heat gun or a torch to remove air bubbles from the surface of the epoxy resin.
- Allow the epoxy resin to cure for the recommended time before moving on to the next step of mixing and pouring.
4. Removing Air Bubbles
- To effectively remove air bubbles from the surface, use a heat gun or propane torch after pouring the epoxy resin.
- Gently move the heat source over the epoxy to allow the bubbles to escape and the surface to smoothen.
- Repeat this process until all visible air bubbles have been eliminated, resulting in a clear and flawless finish.
5. Adding Pigments or Dyes
- Prepare the epoxy resin mixture according to the instructions provided by the manufacturer.
- Add the desired pigments or dyes to the resin mixture and stir thoroughly until the color is evenly distributed.
- Ensure the mold is prepared for pouring before adding the pigmented resin.
- Pour the pigmented resin into the mold, making sure to cover the entire surface and distribute the color evenly.
- Use a heat gun or torch to eliminate any air bubbles that may have formed during the pouring process.
- Allow the resin to cure and set for the recommended period.
6. Sanding and Finishing the Table
- Sanding the table: Start by sanding the entire surface of the table with coarse-grit sandpaper to eliminate any imperfections and level the epoxy with the wood.
- Finishing the table: Once the sanding is complete, switch to fine-grit sandpaper to smooth out the surface. Then, apply a coat of epoxy or varnish to achieve a glossy finish and protect the table from wear and tear.
How Long Does It Take to Make a River Table?
- Preparation: Select the wood, plan the design, and gather the necessary tools and materials.
- Creating the Mold: Build a sturdy and tightly sealed mold to prevent any leakage.
- Pouring the Resin: Mix the resin and carefully pour it into the mold, allowing it to cure for several days.
- Sanding and Finishing: After curing, sand the surface and apply a finish, then allow it to dry.
Fact: The time it takes to make a river table can vary depending on factors such as the complexity of the design, the type of wood used, and the curing time of the resin.
What Are Some Tips for Making a River Table?
- Wood Selection: When making a river table, it’s important to choose stable, well-dried wood such as black walnut or cherry to prevent warping and cracking.
- Resin Choice: For optimal durability and clarity, use high-quality, UV-resistant epoxy resin.
- Creating the Mold: Be sure to create a well-sealed, leak-proof mold to contain the resin and prevent any unwanted leaks.
- Layering Technique: To achieve the desired look, pour the resin into layers and add pigments or dyes for added color.
- Finishing: Once the resin has cured, sand the surface and apply a clear coat to enhance shine and protect the table.
What Are the Benefits of Making a River Table?
The advantages of constructing a river table include producing a one-of-a-kind furniture piece that serves as an excellent conversation starter. The table’s beauty and ability to be customized add a personal touch, elevating the overall atmosphere of the room. Moreover, creating a river table offers a chance to work with various materials and techniques, promoting creativity and honing woodworking skills.
How Do You Care for a River Table?
- Regular Cleaning: Wipe the river table with a damp cloth and mild soap to remove dust and dirt.
- Preventive Maintenance: Apply a protective finish to shield the table from moisture and stains.
- Avoid Heat and Sunlight: Keep the river table away from direct sunlight and hot items to prevent warping and discoloration.
- Repair Surface Damage: Sand and refinish any scratches or marks to maintain the river table’s appearance.
My friend inherited a river table and has kept it in pristine condition by following these care steps, ensuring it remains a cherished family heirloom for years to come.